Recently I had a very interesting case when Sitecore installer was failing during installation because required a secured connection with the SQL Server. It was even more interesting because the connection at the beginning was established correctly, some of the databases were created and then …. during a step related to xConnect and xDB databases I saw an error saying:
A connection was successfully established with the server, but then an error occured during the login process. (provider: SSL Provider, error: 0 – The certificate chain was issues by an authority that is not trusted.)
After some time spent on checking certs generated by Sitecore I realized that I was looking for a solution in the wrong place.
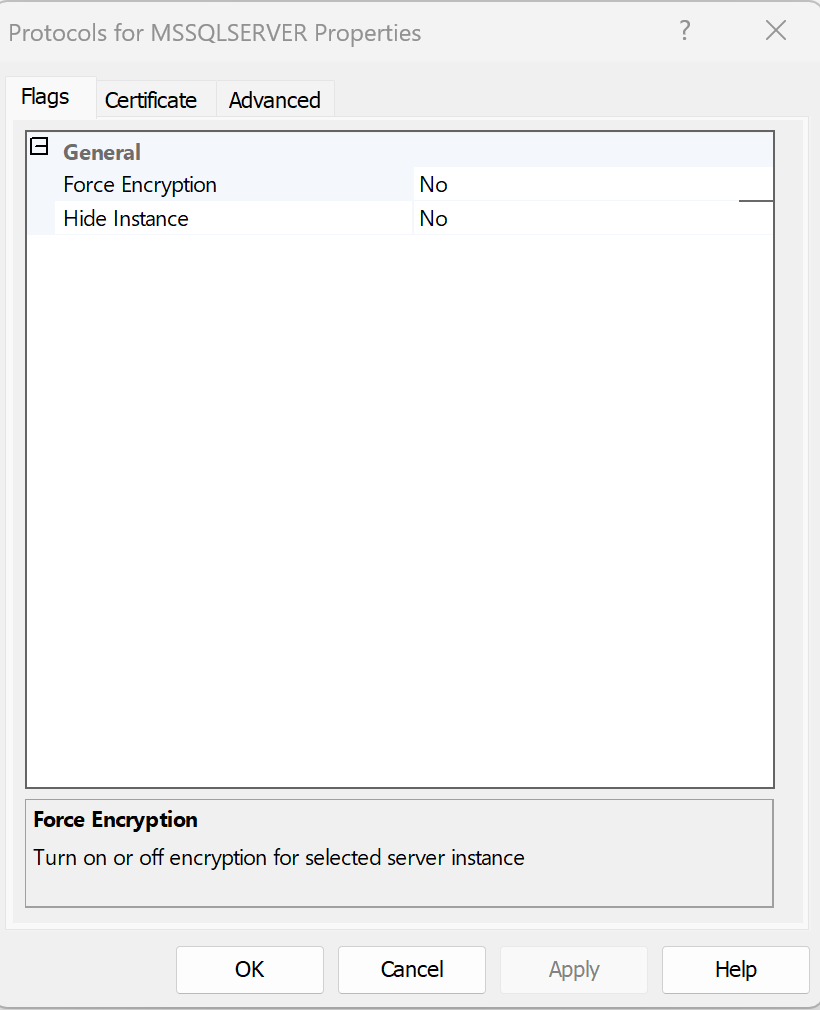
By default SQL Server instance does not use any encryption for incoming connections:
So it should not be a problem – but it was. I decided to add a self-signed certificate to my SQL Server instance to check if it resolved the problem (spoiler alert: it did).
SQL Server requires certificates prepared in a special format. You can generate a certificate with this PowerShell script
New-SelfSignedCertificate -Type SSLServerAuthentication -Subject "CN=$env:COMPUTERNAME" -FriendlyName "SQL Server Self-signed" -DnsName "$env:COMPUTERNAME",'localhost.' -KeyAlgorithm RSA -KeyLength 2048 -Hash 'SHA256' -TextExtension '2.5.29.37={text}1.3.6.1.5.5.7.3.1' -NotAfter (Get-Date).AddMonths(24) -KeySpec KeyExchange -Provider "Microsoft RSA SChannel Cryptographic Provider"-CertStoreLocation "Cert:\LocalMachine\My"
Details of it are described here:
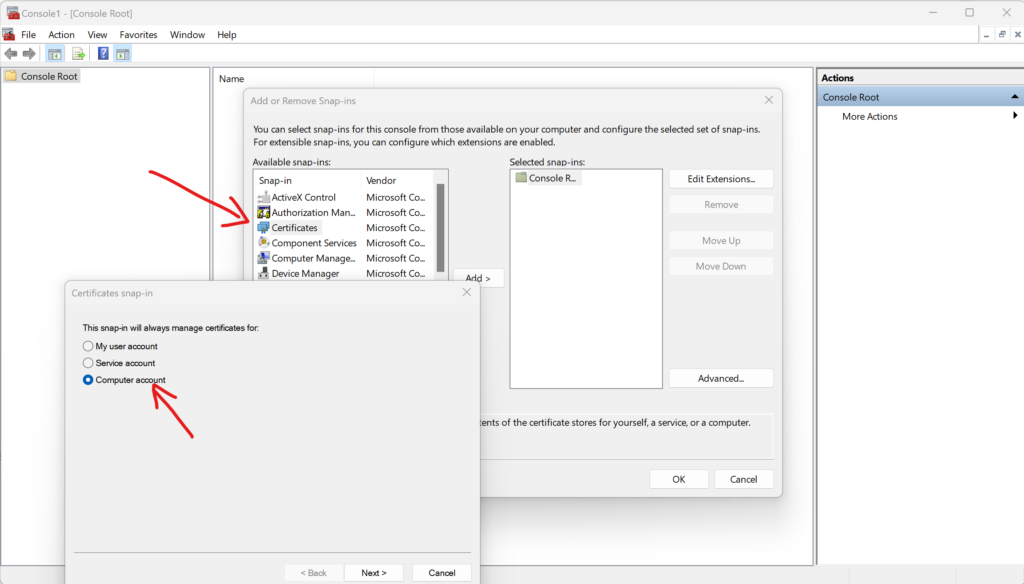
When the certificate is generated and added to the certs store you will find it by running mmc (from Windows > Run) where you have to select certificates for your computer.
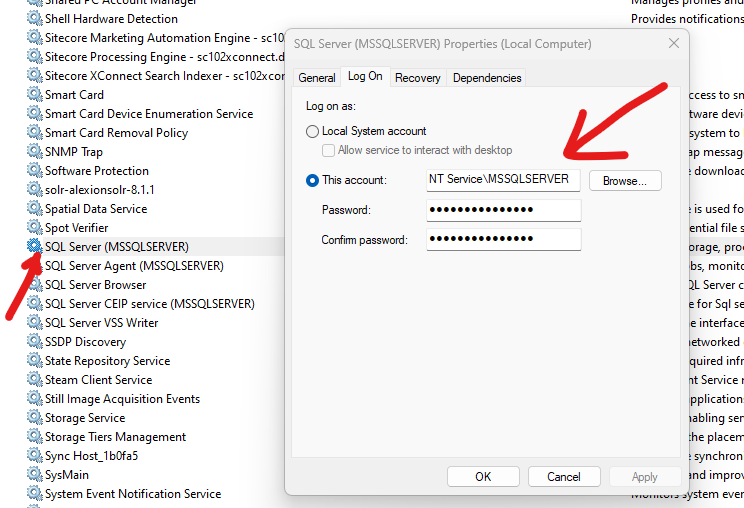
Now, you have to assign rights to read that certificate for your SQL Server instance.
Open “Services” app and find your “SQL Server” service and check its properties. In the “Log On” tab you will find user name used to run this service:
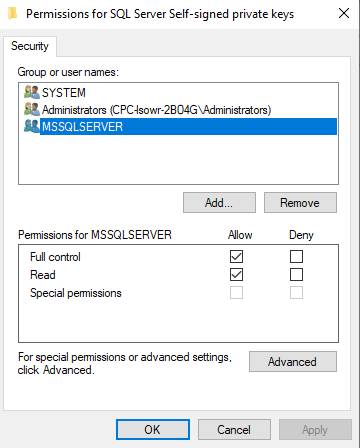
Now you need to go back to the Certs Store and on your self-signed certificate right-click and select options:
All Tasks > Manage Private Keys
You have to add there a SQL Server user and add it to the list of users allowed to read that key:
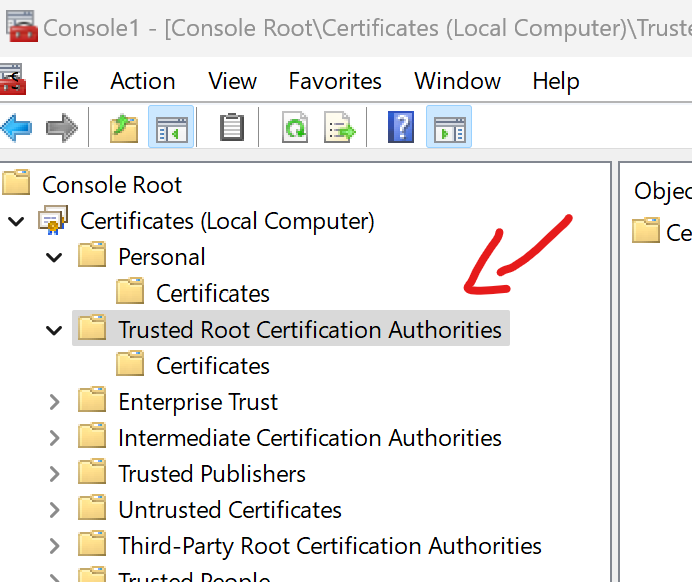
I would recommend also copying your key to the “Trusted Root Certification Authorities” folder:
Then export your certificate with a private key using encryption AES256-SHA256:
Ok, at this point you have already exported the certificate ready to be used by your SQL Server.
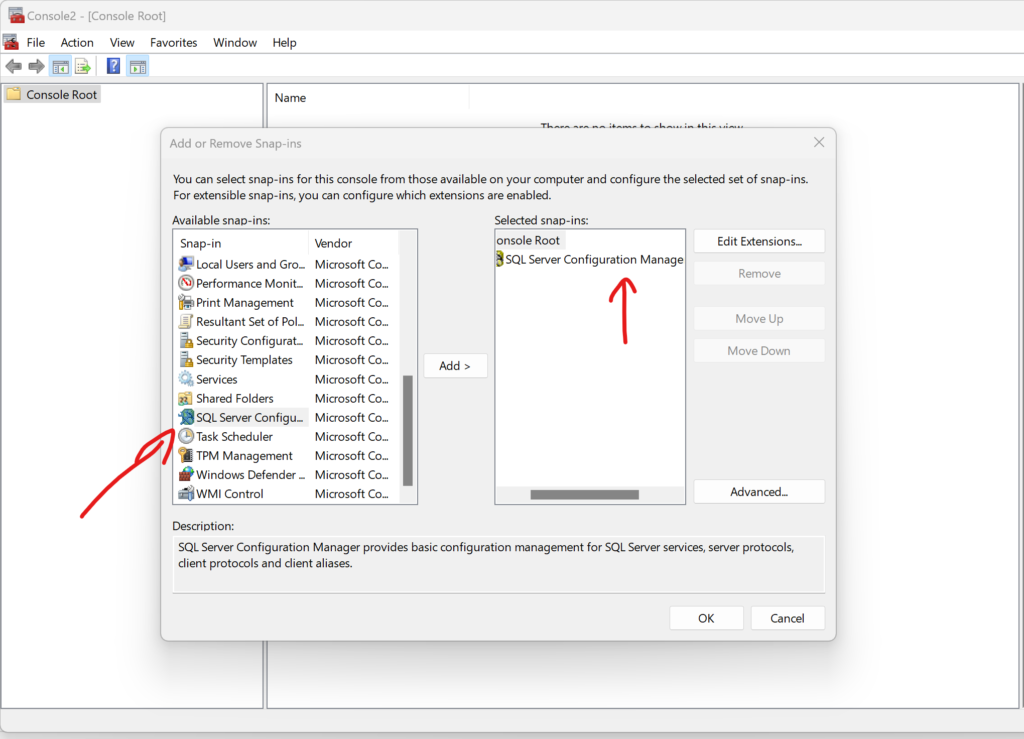
Again open MMC and this time select SQL Server Manger from the list:
Then go to the “SQL Server Network Configuration” node and right-click protocols to select the properties option:
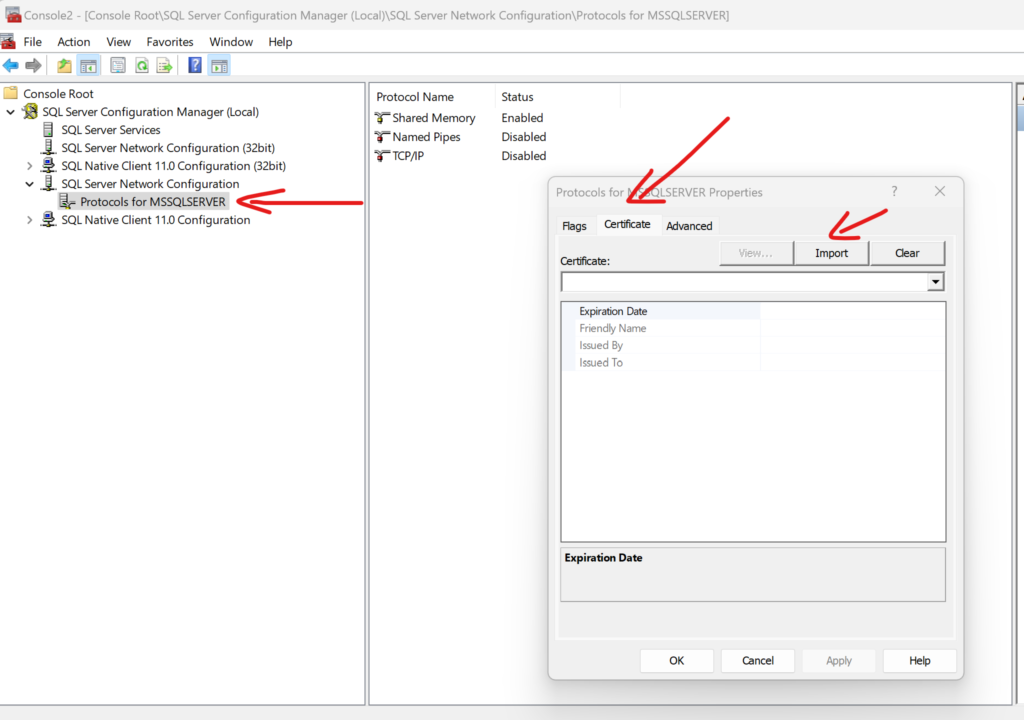
In the opened window select “Certificate” tab and import the certificate that you have just exported.
Restart your SQL Server instance and your error should be gone now.