WFFM – incorrect formsRoot ID – Multisite

Today I want to share with you an solution for very unclear error which can occurs when we use Web Forms For Marketers in multisite solution.

You will see this error inside Experience Editor when you will be able to select forms:
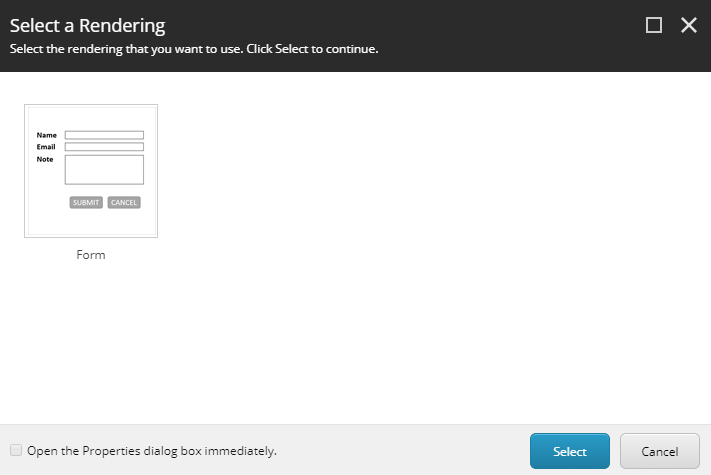
Regarding to Sitecore documentation if you will add “formsRoot” parameter to the “site” node in configuration file – you will be able to define different forms root for every page.

But what will happen if ID which you will define will not exist in content tree or you will make a typo and it will not be properly ID? You will see following error:

Index (zero based) must be greater than or equal to zero and less than the size of the argument list.

Description: An unhandled exception occurred during the execution of the current web request. Please review the stack trace for more information about the error and where it originated in the code. 

Exception Details: System.FormatException: Index (zero based) must be greater than or equal to zero and less than the size of the argument list.

Source Error: 

An unhandled exception was generated during the execution of the current web request. Information regarding the origin and location of the exception can be identified using the exception stack trace below.

Stack Trace: 


[FormatException: Index (zero based) must be greater than or equal to zero and less than the size of the argument list.]
   System.Text.StringBuilder.AppendFormatHelper(IFormatProvider provider, String format, ParamsArray args) +14649723
   System.String.FormatHelper(IFormatProvider provider, String format, ParamsArray args) +105
   System.String.Format(String format, Object[] args) +103
   Sitecore.Data.DataProviders.Sql.SqlDataApi.CreateCommand(String sql, Object[] parameters) +189
   Sitecore.Data.DataProviders.Sql.<>c__DisplayClass12.b__10() +30
   Sitecore.Data.DataProviders.NullRetryer.Execute(Func`1 action, Action recover) +286
   Sitecore.Data.DataProviders.Sql.SqlDataApi.CreateReader(String sql, Object[] parameters) +281
   Sitecore.Data.DataProviders.Sql.SqlDataProvider.ResolvePaths(String itemPath) +406
   Sitecore.Data.DataProviders.Sql.SqlDataProvider.SelectSingleID(String query, CallContext context) +126
   Sitecore.Data.DataProviders.DataProvider.SelectSingleID(String query, CallContext context, DataProviderCollection providers) +118
   Sitecore.Data.DataManager.SelectSingleItem(String query, Boolean& processed) +66
   Sitecore.Data.DefaultDatabase.SelectSingleItem(String query) +74
   Sitecore.Form.Core.Utility.SiteUtils.GetFormsSites() +620
   Sitecore.Form.Core.Utility.Utils.GetFormRoots() +138
   Sitecore.Forms.Shell.UI.CreateFormWizard.OnLoad(EventArgs e) +1109
   Sitecore.Forms.Shell.UI.InsertFormWizard.OnLoad(EventArgs e) +99

[TargetInvocationException: Exception has been thrown by the target of an invocation.]
   System.RuntimeMethodHandle.InvokeMethod(Object target, Object[] arguments, Signature sig, Boolean constructor) +0
   System.Reflection.RuntimeMethodInfo.UnsafeInvokeInternal(Object obj, Object[] parameters, Object[] arguments) +128
   System.Reflection.RuntimeMethodInfo.Invoke(Object obj, BindingFlags invokeAttr, Binder binder, Object[] parameters, CultureInfo culture) +146
   Sitecore.Reflection.ReflectionUtil.InvokeMethod(MethodInfo method, Object[] parameters, Object obj) +89
   Sitecore.Web.UI.Sheer.ClientPage.OnLoad(EventArgs e) +593
   System.Web.UI.Control.LoadRecursive() +68
   System.Web.UI.Page.ProcessRequestMain(Boolean includeStagesBeforeAsyncPoint, Boolean includeStagesAfterAsyncPoint) +3811

Do not loose your time for debugging – just check IDs for ALL sites – it is not important which site you are editing at the moment.

You can have there typo or root item does not exist in content tree. You have to verify all sites because during opening InsertFormWizard control – WFFM loads all configuration nodes.
Sitecore 9 development with Visual Studio 2015

If you have been using Visual Studio 2015 and now you want to start new project with Sitecore 9 you might have a small issue with supported by VS .Net Versions because VS2015 by default supports .Net up to 4.6.1 and Sitecore 9 works only with .Net 4.6.2.

There is an easy solution for this issue – install following “Microsoft .NET Framework 4.6.2 Developer Pack” which will add 4.6.2 support into yours Visual Studio 2015.

Sitecore 9 – set up SOLR SSL step by step

I’ve noticed that many people have many issues with set up of SSL for SOLR instance. In this blog post you will find everything what you need to know to do this. Just follow all steps which you will find below.

  1. Download SOLR 6.2.2
    If you want to install SOLR on Windows get zip file from following page: http://ftp.ps.pl/pub/apache/lucene/solr/6.6.2/
    then extract files into (you can choose different directory if you want).

    C:\solr\solr-6.6.2
  2. Download Not Sucking Service Manager and install Solr as a service
    You will find zip here: https://nssm.cc/download – just extract it somewhere and go to this path in your PowerShell window. Then call

    .\nssm.exe install NameOfSolrService

    and you will see new window with some settings. Set there following values:

    - Path: C:\solr\solr-6.6.2\bin\solr.cmd
    
    - Startup Directory: C:\solr\solr-6.6.2\bin
    
    - Arguments: start -p 662 -f -v

    After form submission you should see new service on the list of services (Windows > Run > Services) . If your service is not running – just run it from services windows – it will start automatically after restart.
    We have chosen port 662 so our SOLR instance currently will be available under url http://localhost:662/solr/

  3. Generate SOLR Certificates
    We use approach from this website https://lucene.apache.org/solr/guide/6_6/enabling-ssl.html#EnablingSSL-BasicSSLSetup
    At the beginning you should check if you have JRE installed – if not install it and then in the path

    C:\Program Files (x86)\Java\jre1.8.0_141\bin\keytool.exe

    you will find keytool.exe which will generate certificates for you (you might have different path – depends on version of JRE).
    Then open again PowerShell and enter into SOLR directory

    C:\solr\solr-6.6.2\server\etc

    and run following command

    & 'C:\Program Files (x86)\Java\jre1.8.0_141\bin\keytool.exe' -genkeypair -alias solr-ssl -keyalg RSA -keysize 2048 -keypass secret -storepass secret -validity 9999 -keystore solr-ssl.keystore.jks -ext SAN=DNS:localhost,IP:127.0.0.1 -dname "CN=localhost, OU=Organizational Unit, O=Organization, L=Location, ST=State, C=Country"

    You should notice that we have got there keypass equal to “secret” which can be changed on local, and should be changed on other environments.
    Then we need to convert key to PEM format with command:

    & 'C:\Program Files (x86)\Java\jre1.8.0_141\bin\keytool.exe' -importkeystore -srckeystore solr-ssl.keystore.jks -destkeystore solr-ssl.keystore.p12 -srcstoretype jks -deststoretype pkcs12

    You will be asked few times for password – use “secret” or your own.
    Then we need to convert generated key for next format with OpenSSL – download OpenSSL from here https://indy.fulgan.com/SSL/openssl-0.9.8r-x64_86-win64-rev2.zip and extract into

    C:\Program Files (x86)\OpenSSL

    and run command:

    & 'C:\Program Files (x86)\OpenSSL\openssl.exe' pkcs12 -in solr-ssl.keystore.p12 -out solr-ssl.pem
  4. Import certificate to the trusted certificates
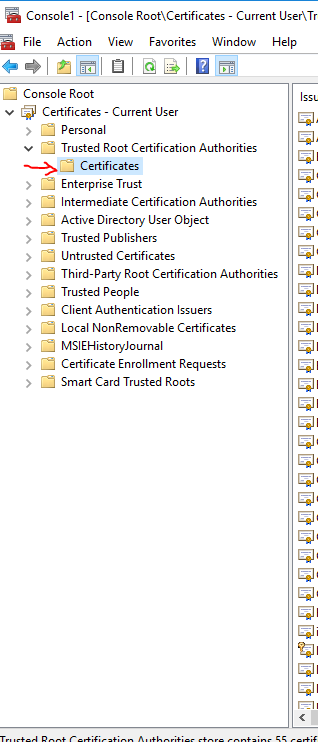
    Opem “Windows > Run > mmc” and manage certificates. Import created certificate to the list of trusted ones.
  5. Change SOLR settings
    In final step you need to change yours configuration for SOLR. Open SOLR server directory

    C:\solr\solr-6.6.2\bin

    and open to edit of solr.in.cmd file. Then add at the end following settings:

    set SOLR_SSL_KEY_STORE=etc/solr-ssl.keystore.jks
    
    set SOLR_SSL_KEY_STORE_PASSWORD=secret
    
    set SOLR_SSL_TRUST_STORE=etc/solr-ssl.keystore.jks
    
    set SOLR_SSL_TRUST_STORE_PASSWORD=secret
    
    REM Require clients to authenticate
    
    set SOLR_SSL_NEED_CLIENT_AUTH=false
    
    REM Enable clients to authenticate (but not require)
    
    set SOLR_SSL_WANT_CLIENT_AUTH=false
  6. Test
    To test if it works you need to restart yours SOLR service. After restart SOLR will not longer work with http protocol – so you need to go into “https://localhost:662/solr” to check how your SSL works.

And now you are ready to install Sitecore 9 and xConnect. Have a good fun with it!

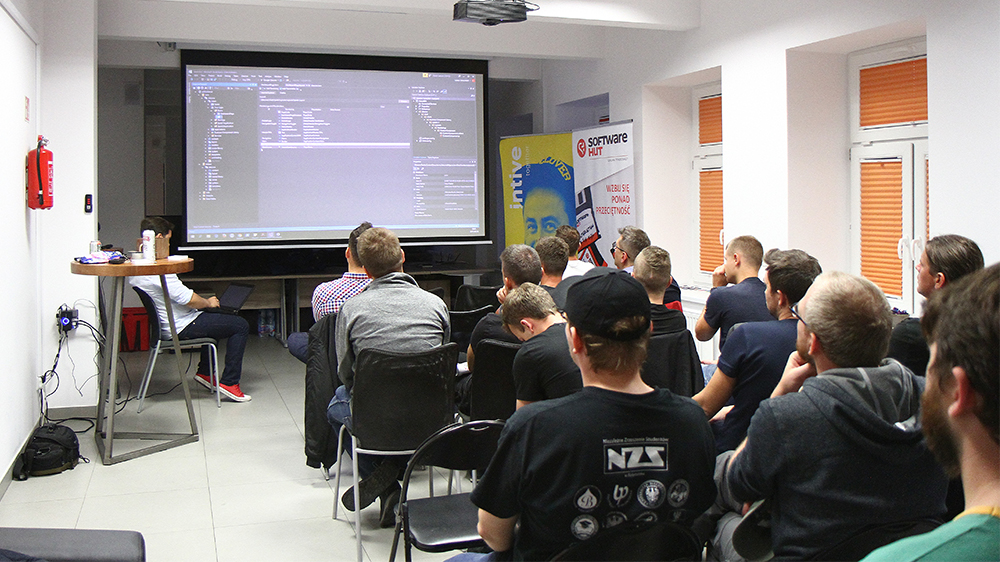
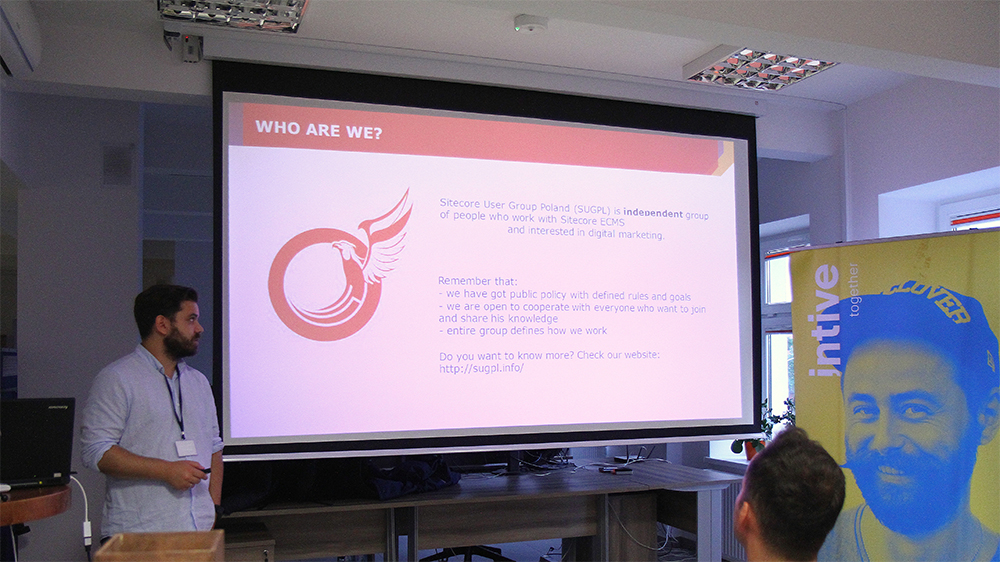
Presentation about SPEAK – 15 September 2017 Bialystok

On 15 September in Bialystok I had a pleasure to talk about SPEAK 2.

During presentation I showed how to start working with Sitecore and how to prepare own custom components.

It was great to share that knowledge and answer to many questions about basic and more advanced stuff.

Few photos from the event:


Sitecore SPEAK 2 – Stage 2- creation of custom component

I had an opportunity to work again with SPEAK 2 and I have got few new tips for you.

If you have not seen yet my previous article – you can (if you are new in SPEAK you should) check it here. You have seen it? – great, we can move forward.

How to create custom component in SPEAK 2

I was looking for the answer for some time and I have found many blog posts which are not up to date – every time when I was trying to run the code, something was wrong. Hopefully my solution will work longer and for everyone 🙂

Before we will start – remember one thing – location of files and items is extremely important in SPEAK2.

To create custom component you need to prepare following things:

  • item in core database – to define the component
  • cshtml file to define how it looks like
  • JavaScript file to define how it works

Item with definition in core database

In manuals on the internet you will find the information that you can put custom component in the structure tree below your SPEAK application – in this case structure would look like this:

- YOUR'S SPEAK APP
 -- Renderings Folder
 --- Definition of the custom rendering

Probably it would work for SPEAK1 but will not work for SPEAK2. In new version of SPEAK you should put all your components in the place where all predefined components are “/sitecore/client/Business Component Library/version 2/Layouts/Renderings”.

So we are starting from creation of new directory for the component:

Then inside this directory we have to create definition of our component:

As you probably have noticed it is just a “View Rendering”. Inside this item we should define values at least for following fields:

  • Path (path to the file with view)
  • Model (definition of model which we want to use in our view – in my case I took just one prepared by Sitecore)
  • Parameters Template (item with configuration of parameters for the component)

Ok, before we will select value in Parameters Template field we have to create the configuration item – it should be placed below the Custom Component.

Yes it is template and it is a good idea to inherit fields from one of available base templates.

In my case I have selected “ButtonControlBase” template – later you can specify “__Standard Values” item.

Great – we have definition of our component – it is time for some coding.

File with definition of view

Files, exactly as items, should be placed in particular directory. In the case of our component it will be:

\sitecore\shell\client\Business Component Library\version 2\Layouts\Renderings\CustomComponent

Inside this path we can then create CustomComponent.cshtml file with content:

So at the end it will look like this:

Ok, we have our view – it is time for some JavaScript.

File with JavaScript code

JavaScript file should be placed in the same directory as cshtml file.

When we develop new component we should always define “initialize” function which will be called every time when our component will be displayed. We can also define own functions  – like I defined “getTheListOfComponents”.

My function is taking the list of components from the application and then display some html.

As you can see there – I use “Sitecore.Speak” in JavaScript code – it is JavaScript object provided by Sitecore.

Inside Sitecore.Speak you will find a lot of useful functions and properties. Just open your browser console and play with it.

What next?

At this point you should have defined component with some HTML and JavaScript – it means that you should be able to use that component in the same way as others developed and provided by Sitecore.

To test our new component you need to define own application (If you do not know how to do this – check my previous post about SPEAK).

There is one extremely important thing which you have to check before you will put any SPEAK2 component in your application – configuration of the PageCode component. 

Open “Design Layout” for your page and check the properties of “PageCode”. In the field “SpeakCoreVersion” you should have selected value “SPEAK 2-x”.

Now, when we are sure that everything is set properly – it is time to add new rendering to our application.

When your’s component is added – remember to define properly “PlaceholderKey” to be sure that your component will be visible.

In my case it is “ApplicationContent.Main” – but it strongly related to the structure of your application.

As a result you will see your content from the view:

That is cool! But you probably remember that we had also a custom function “getTheListOfComponents” – it is time to use it!

We can call our function from many places – to be honest, from every place where Sitecore.Speak object is available. We just need to use code:

Sitecore.Speak.app.COMPONENT_ID.FUNCTION()

In my example I will use button. Below the custom component I added Button rendering and I set the value “javascript:app.CustomComponent1.getTheListOfComponents()” in “Click” field:

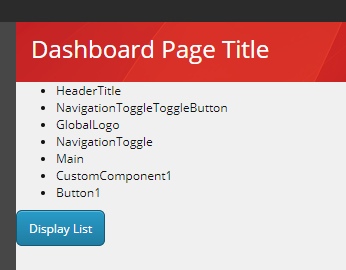
Finally we have component and the button:

When we will click the button – our action will trigger the function from the Custom Component and will display the list of components inside it.

It is alive! What means that you can do with it everything what you want – have a fun 🙂


Common issue

During development of my custom component I had and error message from Sitecore JavaScript library.

"Uncaught TypeError: Cannot read property 'model' of undefined"

Error was thrown from scSpeakPresenter.js file

More interesting was the fact that this part of code is not called by existing Sitecore components – it is called only when you register own components.

At this level you can also notice that even when we call SPEAK 2 components they are loaded with SPEAK 1 url

~/speak/v1

It means that we have there routing and behind it we have some code which search for particular files to load all ingredients of the component.

Because of that if you will put your files in wrong directory you will see an error similar or exactly the same which I had – check locations of your files once again. The second option – you forgot about the SpeakCoreVersion setting inside PageCode properties.