SQL Server Self-Signed certificate required by Sitecore installer

Recently I had a very interesting case when Sitecore installer was failing during installation because required a secured connection with the SQL Server. It was even more interesting because the connection at the beginning was established correctly, some of the databases were created and then …. during a step related to xConnect and xDB databases I saw an error saying:

A connection was successfully established with the server, but then an error occured during the login process. (provider: SSL Provider, error: 0 – The certificate chain was issues by an authority that is not trusted.)

After some time spent on checking certs generated by Sitecore I realized that I was looking for a solution in the wrong place.

By default SQL Server instance does not use any encryption for incoming connections:

So it should not be a problem – but it was. I decided to add a self-signed certificate to my SQL Server instance to check if it resolved the problem (spoiler alert: it did).

SQL Server requires certificates prepared in a special format. You can generate a certificate with this PowerShell script

New-SelfSignedCertificate -Type SSLServerAuthentication -Subject "CN=$env:COMPUTERNAME" -FriendlyName "SQL Server Self-signed" -DnsName "$env:COMPUTERNAME",'localhost.'  -KeyAlgorithm RSA -KeyLength 2048 -Hash 'SHA256' -TextExtension '2.5.29.37={text}1.3.6.1.5.5.7.3.1' -NotAfter (Get-Date).AddMonths(24) -KeySpec KeyExchange -Provider "Microsoft RSA SChannel Cryptographic Provider"-CertStoreLocation "Cert:\LocalMachine\My"

Details of it are described here:

https://www.sqlserver-dba.com/2022/06/how-to-generate-a-self-signed-certificate-for-sql-server-with-new-selfsignedcertificate.html

When the certificate is generated and added to the certs store you will find it by running mmc (from Windows > Run) where you have to select certificates for your computer.
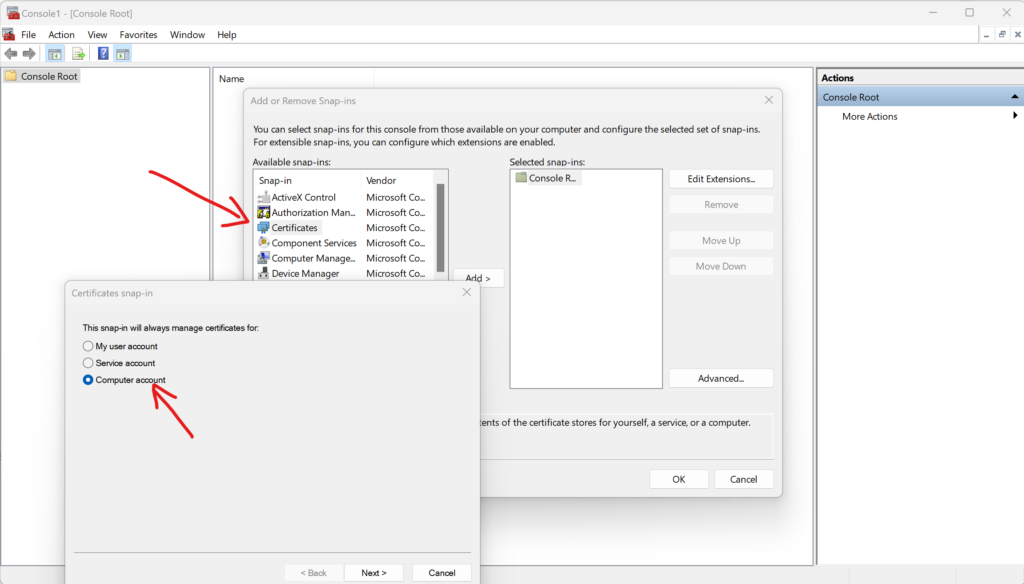
Now, you have to assign rights to read that certificate for your SQL Server instance.

Open “Services” app and find your “SQL Server” service and check its properties. In the “Log On” tab you will find user name used to run this service:

Now you need to go back to the Certs Store and on your self-signed certificate right-click and select options:

All Tasks > Manage Private Keys

You have to add there a SQL Server user and add it to the list of users allowed to read that key:

I would recommend also copying your key to the “Trusted Root Certification Authorities” folder:


Then export your certificate with a private key using encryption AES256-SHA256:
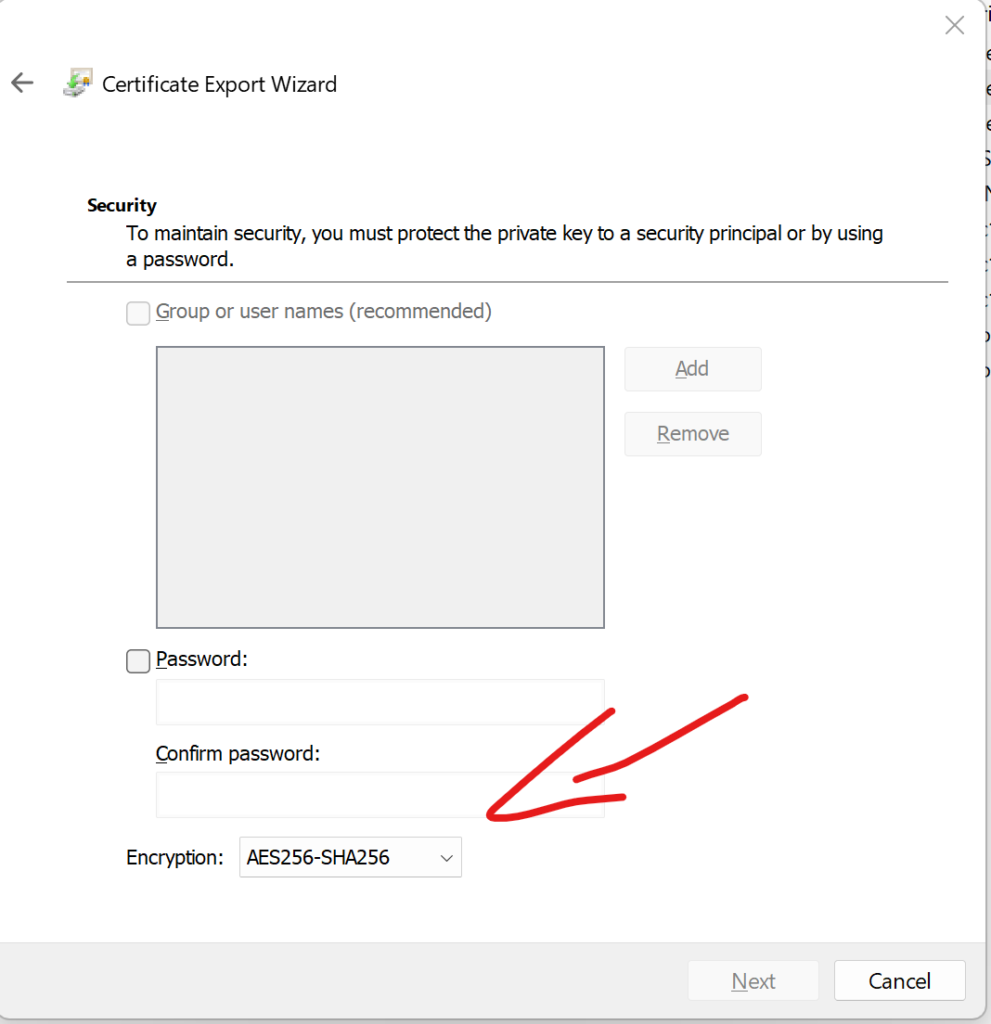
Ok, at this point you have already exported the certificate ready to be used by your SQL Server.

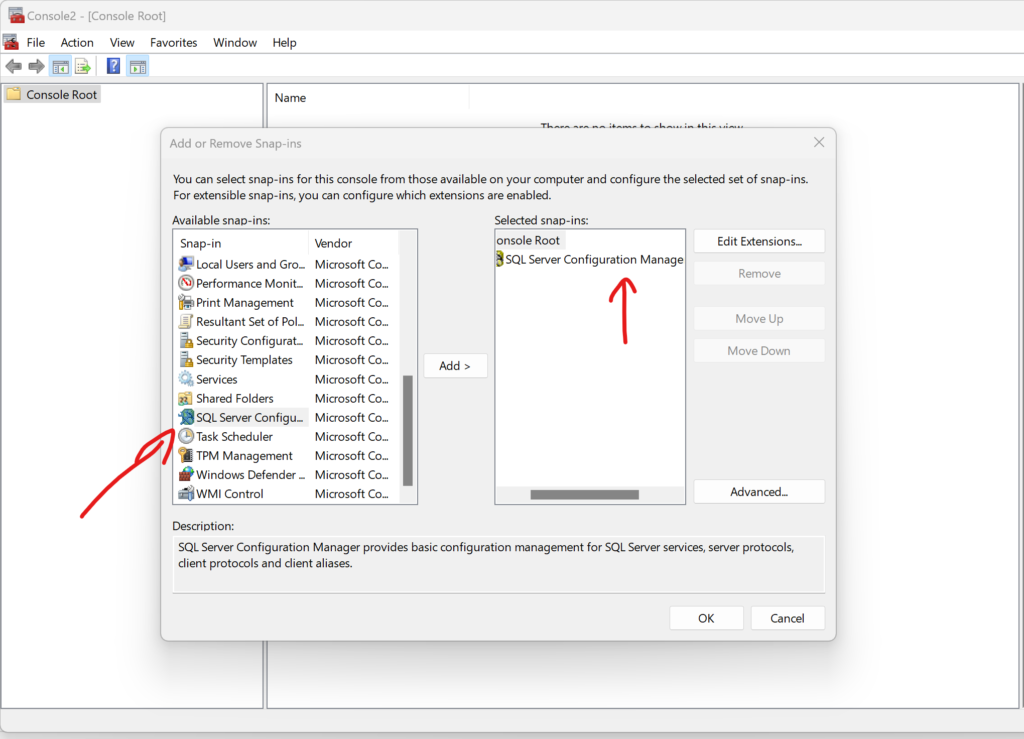
Again open MMC and this time select SQL Server Manger from the list:
Then go to the “SQL Server Network Configuration” node and right-click protocols to select the properties option:
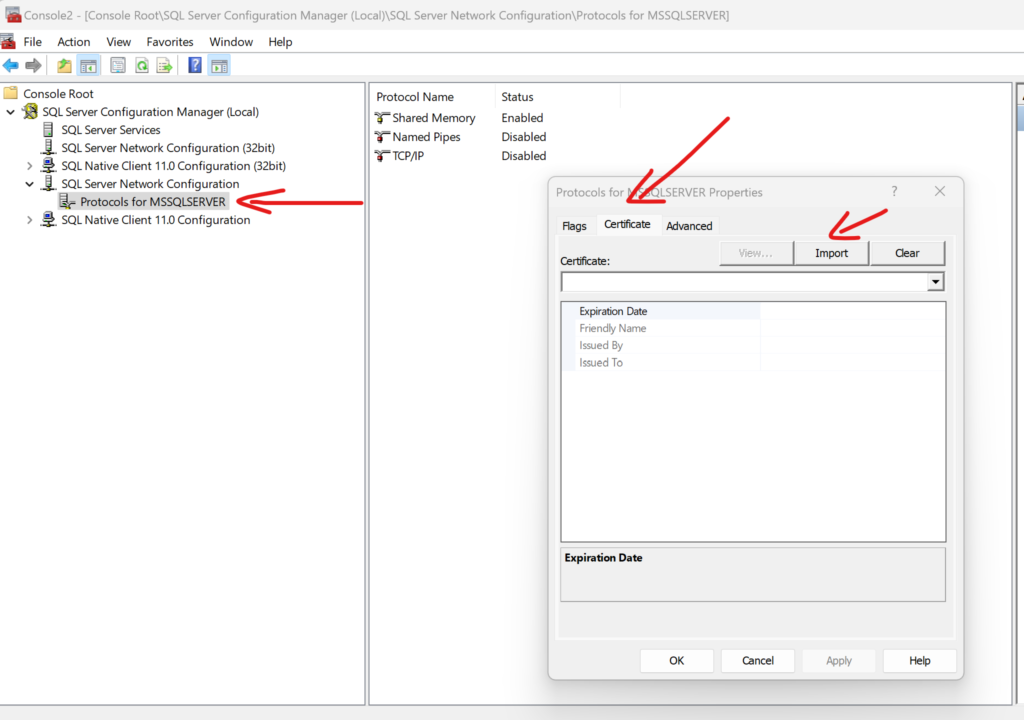
In the opened window select “Certificate” tab and import the certificate that you have just exported.

Restart your SQL Server instance and your error should be gone now.

How to encrypt/decrypt Sitecore connection strings

Sitecore as every other .NET application supports encryption of the connection strings. You can use that feature to secure your connection strings and reduce the chances that someone will steal your passwords to your databases.

It is important to remember that:

  • encryption and decryption are done in the scope of the server
  • encryption and decryption are done in the scope of the application

Alright, but what do the above statements mean in real life?

It means that connection strings files encrypted for one application on one server will not work on different servers and different applications. You need to repeat encryption/decryption for every environment you have and for every application you have.

Sounds like a lot of work – well, security has its own price.

Before you start encrypting your files you need to verify if connectionStrings.config file contains “configBuilders” attribute in the “connectionStrings” node:

If the “configBuilders” attribute is there – you have to remove it.

As a next step, you have to find the aspnet_regiis.exe file in your environment – usually, you will find it in your Microsoft.NET\Framework64 folder. In my case it was the path:

C:\Windows\Microsoft.NET\Framework64\v4.0.30319\aspnet_regiis.exe

When you find it you have everything to run encryption and decryption commands.

To encrypt connectionStrings file you need to run:

C:\Windows\Microsoft.NET\Framework64\v4.0.30319\aspnet_regiis.exe -pef "connectionStrings" D:\inetpub\wwwroot\sc10-dev-cd.localhost

To decrypt connectionStrings file you need to run:

C:\Windows\Microsoft.NET\Framework64\v4.0.30319\aspnet_regiis.exe -pdf "connectionStrings" D:\inetpub\wwwroot\sc10-dev-cd.localhost

And this is basically it, easy peasy lemon squeezy!

Chat about the Sitecore User Group Poland

I recently had a chance to chat with Nicole Montero of Sitecore about Sitecore Polish User Group that I am running with other great folks and MVPs from our region.

I adding it as a blog post to make sure that those who follow my activities here, will not overlook it.

You can read the story behind the Sitecore User Group Poland here: – A conversation with Poland Sitecore User Group Organizer, Łukasz Skowroński – Sitecore Community

Sitecore and ERR_SSL_KEY_USAGE_INCOMPATIBLE error in the browser – Windows 11

Recently I had to install Sitecore 9 on my local environment and when finally I managed to do it I noticed that I cannot access my websites locally.

I started searching for the solution – I thought that maybe something is wrong with the certs and they were generated incorrectly by the older PowerShell scripts – but I was wrong.

The reason was an added support for TLS 1.3 in Windows 11 (that includes IIS of course).

The fix was really easy and I found it here: Sitecore – Running Sitecore on Windows 11 (maartenwillebrands.nl). The only difference is that I had a different error message.

To make your website work in your browser you just need to settings of your website in the IIS and disable TLS 1.3 for it:

When you check it to disable the TLS 1.3 support – restart your website and you’re good to go.